How To Set Up A Centerpin Reel
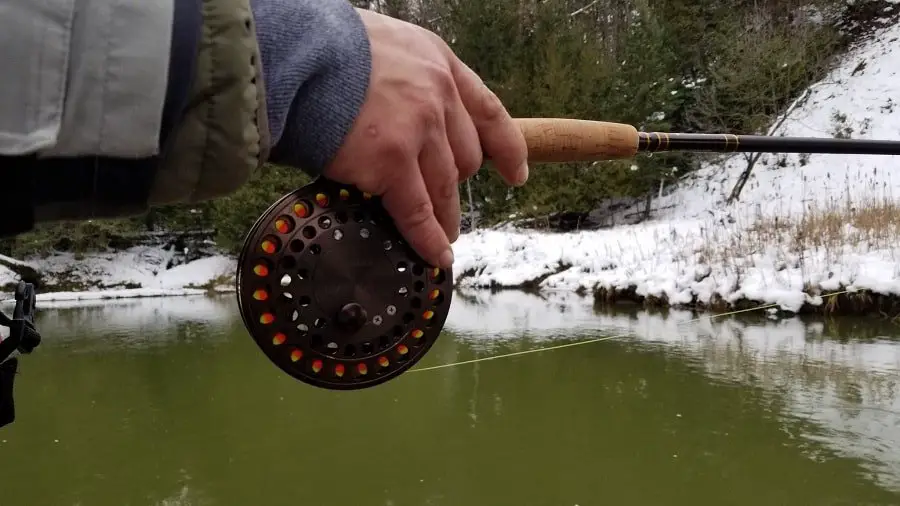
I have set up over 100 Centerpin reels for myself, my clients, and for customers in my tackle store, but you can set up a centerpin reel at home with these tips.
To set up a Centerpin reel, you will first need to know what hand to reel with, then you put backing line on, and then you will need a good floating mainline that works on a Centerpin reel.
Once that is done, proper reel placement on the rod handle, and securing the reel is very important.
Do you know where to place the reel on the rod for best performance? I will explain.
What Hand Should I Reel With?
Centerpin reels free spool both ways and there is no drag on them so they can be used for right-handed retrieve or left-handed retrieve without any adjustments. You simply put the handle on the right or the handle on the left of the rod, and start putting the line on so it goes on and comes of the bottom of the reel.
Are you left-handed or right-handed? It really does make a difference when setting up your Centerpin reel or with any fishing reel for that matter, and I will give you my advice to new anglers!
In my experience, many guys use the wrong hand when using their reel and they don’t even know it. They think they are right-handed, which to them means they should reel with the right hand, but that is wrong!
I have taught thousands of anglers how to use a Centerpin reel as well as baitcasting reels and spinning reels which is why I know for certain that if you use the proper hand you will be able to catch more fish for many reasons.
I also know using the wrong hand can cause lots of problems and make learning to fish more difficult. As a guide, not using the right hand makes my job harder, and for you, as an angler, you will struggle.
My rule of thumb is that if you are right-handed, you need to use your left hand to reel, and if you are left-handed, you need to use your right hand to reel. There are some exceptions to this rule which I will explain.
Why do I recommend doing this?
I see many anglers lose fish, have poor hook sets, do bad casts, and simply have a hard time with Centerpin fishing because they are trying to reel with the wrong hand.
It might sound weird to reel with your opposite hand, but think about it this way.
If you are right-handed, 90% of your fishing should be done with your right hand which includes holding your rod with your right hand, casting with your right hand, controlling the speed of the reel and working the reel with your right hand, setting the hook with your right hand, and fighting the fish with your right hand.
All these very important things should all be done with your dominant right hand, and your left hand or non-dominant hand (which I often call my dumb hand) only needs to reel the line in. It’s as simple as that.
It makes no sense to set the hook with your weak and slow arm or to fight large fish with that same weaker uncoordinated arm.
The non-dominant hand just needs to go round and round and the dominant hand does everything else that is important.
To me, trying to learn how to work and control a Centerpin reel or any fishing reel with your non-dominant hand is like trying to learn how to play darts, throw an axe, or write with your non-dominant hand. You could do it, but why would you?
The only exception to the rule is that if you are an older or very experienced angler that fishes all the time and you have already learned or trained yourself how to reel with the wrong hand then I would say stick with that hand when using a Centerpin reel.
Anglers that fish less than a dozen times a year, do yourself a favor and switch your reels to the proper hand.
How To Set Up A Centerpin Reel: Where To Put Your Reel
Now that you know what hand you should be reeling with, you need to know how to set up a Centerpin reel and the first thing you want to do is to put the reel on the rod on the proper side of the reel for your reeling hand.
You want to do this before putting your line on so you don’t accidentally put it on the wrong way.
Then, you need to put the reel in the proper spot on the handle. If you have a fixed reel seat handle you can skip this part, but, I explain the different Centerpin rod handles and which ones are better.
Fixed Reel Seat Handles
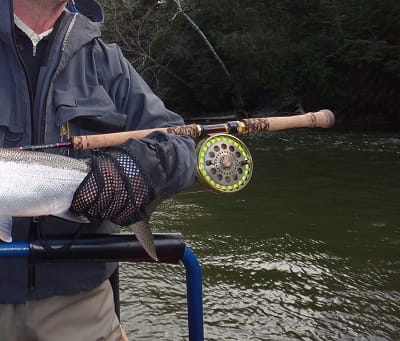
Some rods have a built-in reel seat to secure your reel. You can see this in the picture above. These are known as “fixed handles” and with these rods, you don’t have an option of where on the handle the reel goes.
This type of handle locks the reel in very securely, which is an advantage over other reel handle types, but the spot where the reel goes may not be optimal, and more often than not, the fixed reel seat handle are not in the best spot.
Because companies that make these rods know that some anglers prefer the reel low on the handle and some prefer it high on the handle, most “fixed reel” handles are placed in the center.
My personal opinion on the Centerpin reel in the middle of the handle is that it is an OK spot, but it’s not great.
I know there will be many guys out there that will disagree with me on this but I’m not here to argue about it. When guys disagree with me, I tell them to simply look at all the rods designed for spinning reels and baitcasting and where they place reel seat on those rods.
Musky rods, saltwater rods, bass rods, almost all rods have the reel seat high on the handle with lots of butt section.
On spinning rods and bait casting rods, especially the ones used by the top tournament bass anglers, and fishing guides the reel is always near the top of the handle. There are multiple good reasons why it’s placed there and why these experts prefer it.
These same reasons are why I recommend that you also place your Centerpin reel high on the handle if possible.
I would assume that if putting the reel near the middle or bottom of the handle on spinning rods and baitcasters was better, all those experts that help companies design rods would be making and using rods with reels there, but they don’t.
Sliding Rings Rods: Flexible Reel Placement
On other centerpin rods that use what is called a “sliding rings” handle, you have the flexibility to put the reel anywhere on the handle. I prefer these handles over most fixed reel seat handles, but they often cause confusion for new anglers.
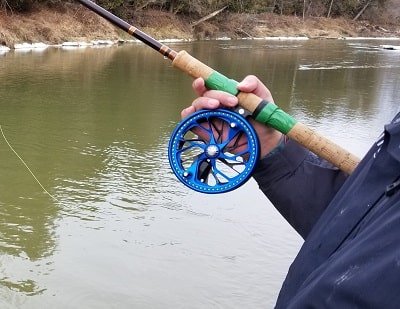
In my experience, you want your reel as far up the handle as possible without your fingers or hand touching the blank. You can see this in this picture of my client’s grip.
The downside to the sliding ring handles is that they are not very secure and they do NOT lock your reel in place well.
I have seen, and have even done this myself back with my first centerpin reel about 30 years ago where the reel will fall off the rod. This might mean your reel lands on the rocks and is permanently damaged, or it could land in deep water and be difficult or impossible to retrieve.
All the times I’ve seen this happens is when guys are fighting fish.
Therefore, you want to secure the sliding rings with some sort of tape. I use electrical tape with one or two wraps maximum. I have seen guys use hockey tape, electrical tape, and masking tape.
I discuss reel placement in more depth as well as how to properly hold your reel on my page How To Hold A Centerpin Reel.
Now that you have your reel on the right way and you have your reel in the right spot and it’s secured you will need to put on the line. There are two types of line used when setting up a Centerpin reel, and both lines need to be the right types of line and ones that are proven to work with Centerpin reels.
Do You Need Backing On A Centerpin Reel?
Most Centerpin reels will hold over 1200 feet of fishing line, so most anglers add a backing line on the reel before adding the mainline. The backing is almost always part of the Centrpin reel setup.
Some Centerpin reels have a shallower spool so you may not need backing or as much line.
The backing is a line that is either made from a monofilament line, braided line, or a Dacron line and is mostly used as a filler so that you can use a typical 200 to 300-yard spool of good floating Centerpin line on top of it.
Many anglers, including me, will use the same Dacron fly line backing line that is used on a fly reel. The backing that I like to use is the Cortland backing from FishUSA.com.
When adding the backing line to the spool, you want to fill only about 1/3rd to half the spool with the backing line. Often, it is recommended to use the manufactures recommendations on how much backing and line to put on the reel.
We put the backing on the same way we do with a fly reel which you will see in some of the video links below.
To attach the backing to the reel, use a simple Arbor Knot or a Uni Knot. Watch how to tie the Arbor knot to the reel.
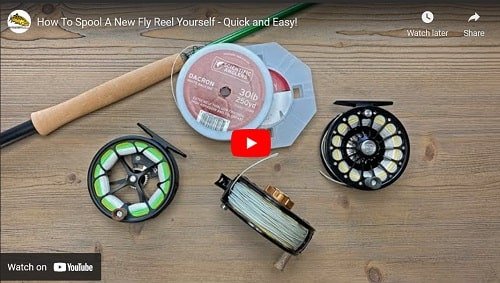
See some tips and tricks on how to add backing to a spool using a Uni Knot at the beginning of this video.
Remember that when put the backing on a Centerpin reel that there is no drag which means it’s easier to make the mistake of reeling the wrong way. Make sure the line goes on from the bottom of the reel.
I put backing line on my centerpin the same way that it’s done on this fly reel.
Once you have the backing tied on, I use a Uni to Uni knot to attach the mainline. Watch this video to see how to tie the Uni to Uni knot.
What Line To Use On A Centerpin Reel?
I mostly use 8 or 10-pound Raven Mainline for Great Lakes steelhead fishing, and it comes in spools of around 800 to 1000 yards depending on the size, but most fishing lines come in spools of 200 to 300 yards and will barely fill an empty Centerpin reel.
When it comes to Centerpin fishing, not all fishing lines are good. The best Centerpin lines will be thin, strong, and should be buoyant, which is why I recommend that you check out my page on 5 Best Centerpin Lines so you make sure you get one that works.
Some conditions and some rivers might require a heavier or a lighter mainline. Check out my page, What Pound Line Is Best For Centerpin Fishing.
How To Put Line On A Centerpin Reel?
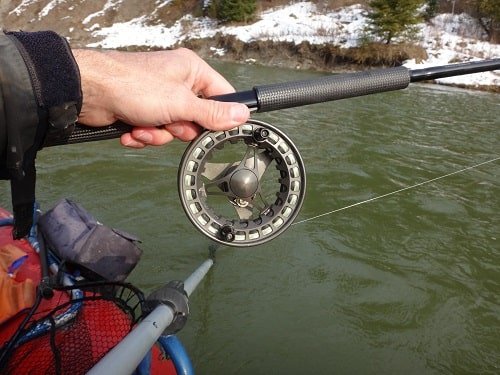
You can tie the line directly to the spool or attach it to the backing with a Uni to Uni knot and the line should always go on and off the bottom of the reel as seen in the picture above.
I have seen videos say to come off the top of the reel near the rod blank and the handle, but trust me, do not do this!
Having the right amount of line will help you fish better, will help you cast, and will help you avoid problems.
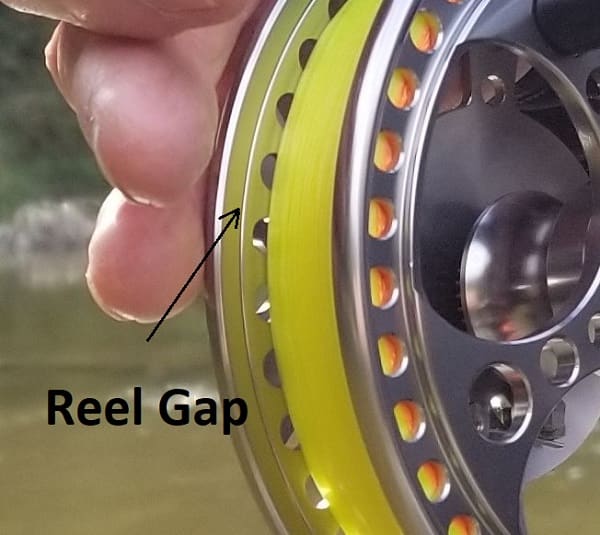
You want to fill the mainline to only about 1/8th of an inch from the gap of the spool which is on the base or back of the reel.
If you add too much, the line can get stuck in behind the spool and get trapped in the gears or internal components.
If you don’t fill the spool up enough it may make casting more difficult especially if you use the side cast, and the more line you have on the spool the larger the surface diameter of the spool is so the uptake of the line is a bit faster.
I use the Berkley Portable Line Spooler Max for all my reels to make sure that I get no twists and to be sure I get the line firmly and evenly on the spool. You can get it through this FishUSA link.
Centerpin Leader Setup
Part of the complete setup of a Centerpin reel is the float and the leader that you use. That is a whole other article, so I recommend that you read my page Steelhead Leaders: Best Float Leader And 2 Proven Setups
Tight Lines
Graham

Are there any videos on doing the actual line spooling on a centerpin? Could you possible do a video and share it on YT? I would like to give that Berkeley Spooler Max a try. Thanks!!!
Hi Ray, I plan on doing a video on how to spool a Centerpin as soon as possible. Right now I have 56 guide trips booked this month alone between myself and my guides so I’m super busy but as soon as things slow down I plan on doing a lot of videos to supplement the articles so keep an eye out for that.
Are there any videos showing live center pin fishing available?
I plan on having videos coming soon because the ones I have seen on Youtube are mostly crap.
Yes I looked on You tube and they were not very instructive
Yep, I agree, and some of it is just wrong info from guys that think they know what they are talking about. I’ve been filming recently but it might have to wait until my guide season is over before I can put something out.
I recently purchased my first centerpin. I bought a Clarus 13′ rod to match up with my reel. How far up the stock should I mount the reel?
Hi Adam,
In my article How To Hold A Centerpin Reel I discuss proper reel and hand positioning.
However, where the reel is placed is a matter of opinion, but my thoughts are that putting the reel near or closer to the butt of the rod is not a good spot as it puts more stress on your wrist and has other complications, but if you put the reel further up the rod handle, the more balanced the rod will be, and this is easier on your wrist and arm and your grip won’t need to be as strong.
Hope that Helps
Graham