Indicator Nymphing: 13 Tips From Expert River Guides
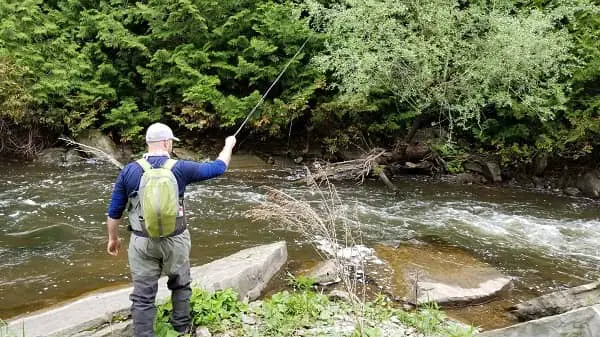
There is a lot more to indicator nymphing than just casting it out and watching your indicator drift down the river. I know this because I’m a full-time fishing guide who teaches anglers how to do nymphing with indicators properly so they can catch a lot more fish.
Indicator nymphing is a fly fishing method where you present a fly below a small float called an indicator. It’s very effective because it allows you to suspend your fly off the bottom in the strike zone and it makes it easier to detect fish bites.
As a fly fishing guide, I have taught thousands of anglers how to catch trout, steelhead, and salmon with indicators, and use more effective methods. Even using the right indicator can also improve your presentation so you will catch more fish.
Key Takeaways
- The Indicator: Some indicators are better than others, and there are plenty to choose from. Using the right indicator can also help you improve your presentation.
- The Nymphing Leader Setup: How you set up your leader is important. I prefer to use two nymphs at the same time whenever I can.
- Presentation: Presentation is the key. Even if you use the right indicator, the right leader setup, and the best flies, if you present it poorly you will struggle to catch fish. Good presentation involves proper mending, depth, and speed control.
- The Proper Nymphing Cast: You CAN NOT use a traditional fly cast or you will most likely have many leader tangles. Learn to flip or lob cast and open your loops. I will provide tips on how to get less tangles.
- The Nymphs: Using the right type of nymphs suitable for indicators will improve your success.
Pro Tip: I’ve learned nymphing techniques from world champion fly anglers, a former head coach of the USA fly fishing team, and other great guides and anglers. The one thing they all do very well is that they are always in control of their indicator at all times and they always know where their fly is.
Why Indicators
Indicators were invented and used 20 to 30 years ago for the purpose of just detecting a bite, but now, good anglers and guides will use indicators for a lot more than that.
Great indicator anglers never just cast it out and watch it go, and neither should you. The best indicator anglers will work their indicator and their fly through every foot of the spot that they are fishing and the results can be ten times better.
13 Key Things For Better Indicator Nymphing
- Use The Right Indicator
- Nymphing Leader Setup
- The Right Rod For Fishing Indicators
- Casting An Indicator
- Get A Good Start To Your Drift
- Mending Properly
- Depth – Setting The Indicator Depth
- Know Where Your Fly Is
- Speed Control
- Covering The Water Effectively
- Proper Hook Sets
- Fly Selection And Rotation
- A Better Nymphing Method
Which Indicator To Use
There are a lot of strike indicators on the market, and most will help you detect a bite from a fish because that is what strike indicators are designed to do, but good nymph anglers also use specific indicators that will also improve their presentation, which means more fish in the net.
If an indicator doesn’t improve my presentation, I won’t use it.
I have an in-depth page on what the best indicators are for different types of river conditions. Check out What Are The Best Indicators For Fly Fishing? Guides Advice.
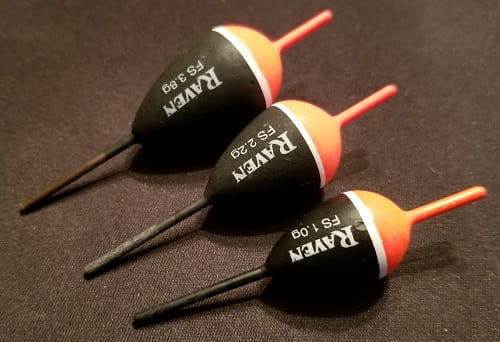
RAVEN FS Indicator Floats – The Raven FS float is the indicator that I use the most to teach my clients about proper depth finding, depth control, speed control, leader angles, and how to know where your fly is.
All of these things are something great anglers will do, and if you understand each of them and know how to do them well you may catch ten times more fish.
When fishing smaller trout rivers where not much weight is required, I like to use the Raven FS, size 1.0g.
For bigger trout rivers or when I’m fishing smaller steelhead rivers where little to medium weight is required, I prefer the Raven FS 2.2g float.
When I’m fishing larger steelhead and trout rivers where a lot of weight might be required or if I’m using bigger flies, I will use the Raven FS 3.8g float. This 3.8-gram size is my go-to size for Great Lake’s steelhead.
The Raven float model that I use is the “Fast Current – Shallow Depth” model which is also known as the FS float.
To attach the float to the leader, I recommend these Drennan float caps.
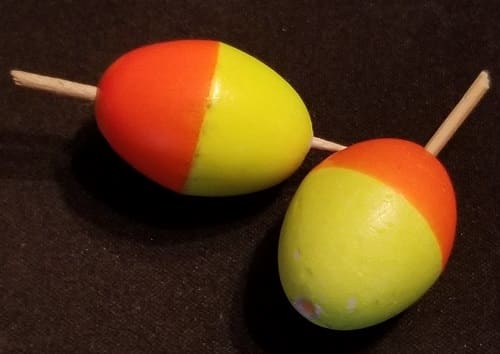
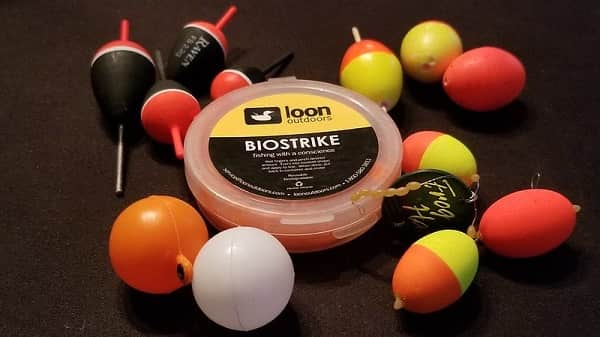
THILL Indicators – The THILL brand of indicators, which is also called the Thill Ice ‘n Fly Special Indicator/Float, is another one of my favorite indicators.
This is a more traditional type of indicator that many anglers and I would use.
I really like oval/football shape and bi-color indicators because their football shape and the bi-color helps me teach anglers about angles, speed control, and where their fly is.
For steelhead and big trout, or when I need more weight, I use the 1.5 inch size.
When using less weight, and for smaller rivers and trout, I will use the 7/8 size. It’s a good idea to get a few sizes.
Good Alternatives that I have used and like equally as well are:
- Frog Hair Football Indicators – Frog Hair was actually my go-to indicator for many years.t.
- Lightning Strike Bi-Visible Football Foam Indicators: Another bi-color football indicator that works.
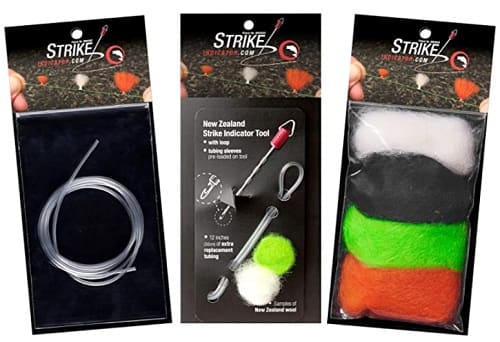
New Zealand Wool Strike Indicators – These are great in shallow clear water when you are fishing for nervous trout and steelhead.
These are a cast, watch, and wait type of indicator. They are not great for speed control or for determining angles or where your fly is.
But in shallow, clear water when a super stealthy presentation is required, the New Zealand Strike indicators can’t be beat.
To see how to use this indicator go to the official New Zealand Strike Indicator website.
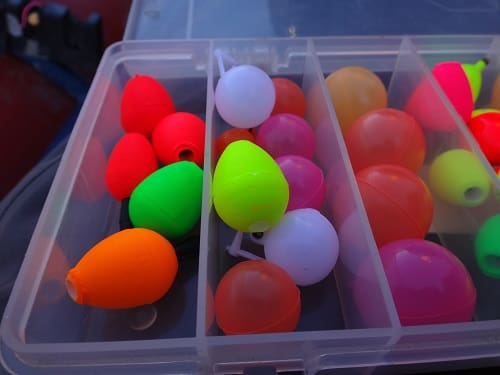
Other Indicators – There are a ton of other indicators available. You can see more of them on my page, Best Indicators For Fly Fishing.
Other indicators come in all shapes and sizes and can be made from different materials.
Indicator Leader Setup
Your nymphing leader setup is important and it must be set up properly.
Be sure you are using the appropriate type and strength of leader material, the proper weights, and the right fly.
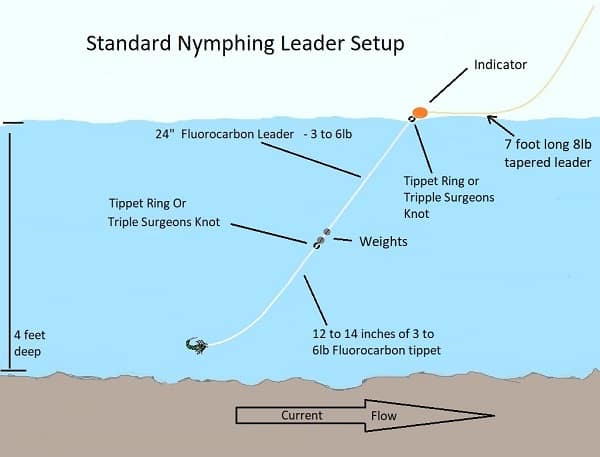
The standard nymphing leader set-up for trout is pretty simple. It includes an indicator, some weight, and a fly or two. You can also use a tippet ring, swivels, or just a triple surgeon’s knot to connect the pieces.
The entire leader should be around 11 to 13 feet long, and the lower tippet section should be 36 to 46 inches long for most rivers in the 3 to 7-foot deep range. If you need to go deeper, you simply slide the indicator up the leader to the desired depth.
Check out my page 3 Best Nymphing Leader Setups – Guide Secrets For More Trout.
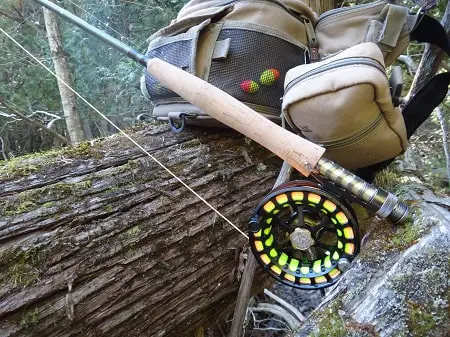
The Best Rod For Indicator Fishing
You could indicator fish with just about any fly rod, but a longer nine to 10-foot rod gives you more reach to stay further from the fish and helps with mending and line control.
Most of the time, I am nymphing with a 10-foot rod.
These nymphing rods are a good choice:
- For small creaks with heavy cover where precision is required, I might consider a shorter rod, like the 7’6 foot 3 weight Orvis Clearwater Freshwater Fly Rod.Check it out all the Ovis clear water rods at FishUSA.com
- For rivers 10 to 50 feet wide that are more open, I love the 10-foot 3-weight or four-weight rods like ones I recommend in my article on the BEST Nymphing rods
- For large rivers and larger trout – A great Nymphing rod under $250 is the 10 foot four-weight or five-weight, or an 11 foot rod is a good option. The Cortland Nymph Series Fly Rod is worth checking out – Check it out at FishUSA.com
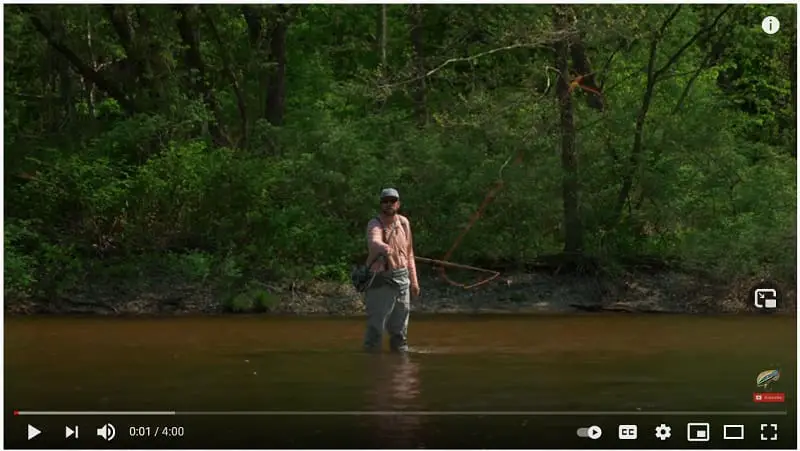
How To Cast An Indicator
Casting a strike indicator is not like casting a dry fly or a streamer. Casting an indicator requires a more drag and flip type of cast.
I call two flies, some weights, and an indicator a lot of junk on the line, and junk tangles and can become a mess very quickly with the wrong cast.
PRO TIP: The best tip I give to my clients is to keep the line and leader straight as it comes out of the water and land it in the water all in a straight line. And DO NOT false cast with an indicator unless you are an advanced fly angler and you know how to slow down your casting stroke and open your loops.
It’s hard to explain in words, so I have included this video of how to cast when indicator fishing.
Get A Good Start To Your Drift
I tell my clients that as soon as the fly hits the water, you need to set yourself up for a good drift.
This means that as soon as your fly hits the water, you need to mend the fly line upriver and above the indicator so that the line doesn’t pull and drag the indicator and then the fly prematurely.
Guide Tip: When you mend your line, you also want to mend the entire leader and the indicator upriver of the fly. Move your indicator 1 to 4 feet upriver from where it is, and do it as soon as possible.
Doing this correctly will take the drag out of the entire system for a few seconds and that will allow your weights and flies to get into the strike zone much faster.
Mending An Indicator Properly
Mending simply means repositioning the fly line to get a better drift. Mending is an important part of good indicator nymph fishing. Mending properly often includes mending the entire leader right to the indicator.
Mending is best done without moving the indicator too much or at all during the drift. Other than the initial first mend where I will mend the fly line, and the leader and the indicator to get my fly down faster, each mend after that I won’t move my indicator at all.
Guide Tip: Guys who repeatedly move their strike indicators throughout the drift when they mend rarely catch a lot of fish, so don’t move your strike indicator unless you are moving it to improve your presentation.
90% of the time, you will need to mend the line upriver of the fly so that the line does not pull and drag the indicator and the fly. The only time I mend downriver is if my fly line is stuck in really slow or still water in close to me, and the current out where the strike indicator is moving faster.
River anglers do a few types of mends.
The most common mend is to move your rod tip from a 45-degree angle downriver to a 45-degree angle upriver to put your line upriver of your indicator. I call this the flip mend.
You do this using a fast half-moon up and over and drop the rod tip mend.
This flip mend is the basic mend that most anglers use, and at times, it will work, but there are often better mends.
I prefer to use a lift and drop mend. In a lift and drop mend, I simply raise my hand and lift my rod high moving the rod tip upriver, I will reach if I need to, and then I will drop my rod tip and the line upriver of the strike indicator where it won’t pull my strike indicator anymore.
This mend doesn’t move your strike indicator or your fly, and it doesn’t rip off the water or splash down as the typical mend does. Making noise when mending could spook fish. See this mend in this YouTube Video -HERE
Another mend that I use a lot, especially when my strike indicator is too far for the lift and drop mend to work is called shoot mending or stack mending. It’s basically a little mini roll cast that shoots your line up off the water and upriver of your indicator. You can see it on this YouTube Video – HERE
Don’t Be Late – Most anglers mend too late. They wait until the fly line has already moved downriver of the indicator and is starting to pull the strike indicator too fast.
You need to learn to anticipate when the line has gone far enough and is about to pull the strike indicator, and you need to mend before this happens. Never let the line pull the strike indicator during your drift. I often tell new anglers to mend as soon or just before your fly line catches up to your indicator.
Learning how to mend effectively and knowing when to mend is a really important skill when learning how to fly fish with an indicator.
Setting The Indicator Depth And Finding The Bottom
Where you set your strike indicator on the leader really depends on how well you know how to control the angle of your leader, how deep the spot is, and the speed of the spot.
The old rule of thumb is to set your strike indicator at 1.5 times the depth of the water that you will be fishing. I don’t agree with this because this is a very basic and old way of thinking.
If the water is very slow, you want to set the depth slightly less than the depth of the spot you are fishing so your fly and weight all stay up and off the bottom.
If the water is faster you set your strike indicator at the same depth of the water and ensure that you have enough weight and mend properly to keep your leader as verticle as possible so your fly suspends just off the bottom.
If you get good at controlling your drag by using the right strike indicators, and you use proper mends, and you have good line control, this type of suspension nymphing is far superior to the old-school method.
How Do You Find The Bottom So You Can Set Your Indicator Properly?
You’re probably wondering, “How do I know how deep the spot is if I can’t see the bottom?” That’s a tough one to answer, especially since most anglers use the wrong indicators that do not help them find the bottom.
When using any indicator, the method that just about every river guide will tell you is to guess the depth and then make a drift, and if the strike indicator is set at the right depth you should only hit bottom one or two times during a drift or, in some cases, you might only hit bottom once every few drifts and although this works it’s not perfect, nothing is.
If your strike indicator drags, twitches, or pulls under and then pops up quickly, you probably just hit the bottom.
Hitting bottom every now and then shows you that your fly is down there, and that’s a good thing.
If you never hit the bottom, your fly might be five feet over their heads and you won’t catch many fish. If you are constantly hitting bottom, you will drag your fly below their heads, and you will also get no fish, and you will probably lose a bunch of flies in the process.
So it’s important to get your fly 6 to 20 inches off the bottom of the river. If you make a cast and you don’t hit the bottom, make it one foot deeper and try again, and then repeat until you start hitting the bottom.
Know Where Your Fly Is
Once the fly sinks below the indicator most anglers have no clue where their fly is. You should always know approximately where your fly is.
If your fly is upriver, it’s probably dragging and going too fast. If your fly is downriver, it could be picked up by a fish, but your indicator won’t detect it because the indicator is moving toward the fish, and slack is going into the leader, so the indicator won’t go down.
Knowing where your fly is can help you control your angles, which keeps your fly down, and it can control your speed, which can greatly increase your success and it can help you detect more bites.
I always know where my fly is, and using the right indicator will really help.
Using the Raven floats, I can easily get a good idea of where my fly is.
If the tip of the float is upriver, then my fly is opposite, and it’s downriver. The more angled the tip is upriver, the further downriver my fly is. It’s that simple.
You can’t do that with a round indicator.
Speed – Controlling Your Speed For 10 Times More Fish
In my opinion, which is based on tens of thousands of hours of watching my clients and other anglers fish and through my own fishing trial and error, one of the most important things that you need to do is control the speed of your fly when you are nymphing.
In fly fishing, we want to get what is called a “dead drift” or a “drag free drift”.
You could have the best fly, the best setup, and the best indicators for fly fishing, but unless you control your speed and drift your fly past the fish at the speed of all the natural food, it can spook the fish, and they will ignore it.
It might even stop large trout from feeding.
Controlling your speed is critical! If your fly drags past the fish, you have a problem. Drag simply means pulling of the indicator, or the pulling of the line or the fly by the current abnormally fast.
I hear anglers and some fishing guides say that you want to match the speed of the bubbles, but the speed of the bubbles is usually too fast.
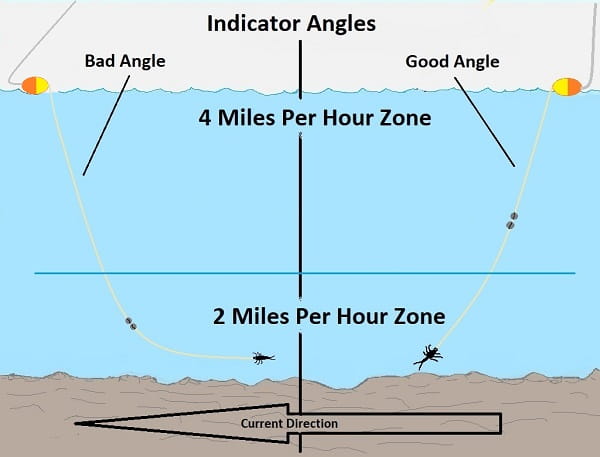
The water at the bottom is often moving at a slower speed than the surface current at the top, so even if your indicator is moving at the speed of the bubbles, your fly is likely moving too fast.
Whenever I see the top of my client’s indicators facing downriver, I know they have a lower chance of catching a fish because it’s dragging.
The best indicators for fly fishing will be either bi-color football-shaped ones or they will have a pointed top like the Raven Indicators.
Both can really help you control the speed of your fly. Learning how to do this could significantly your success.
With round single color indicators, you CAN NOT tell where your fly is very well, and at what angle it’s running at, which makes your speed control very difficult. It can also affect your ability to detect a strike.
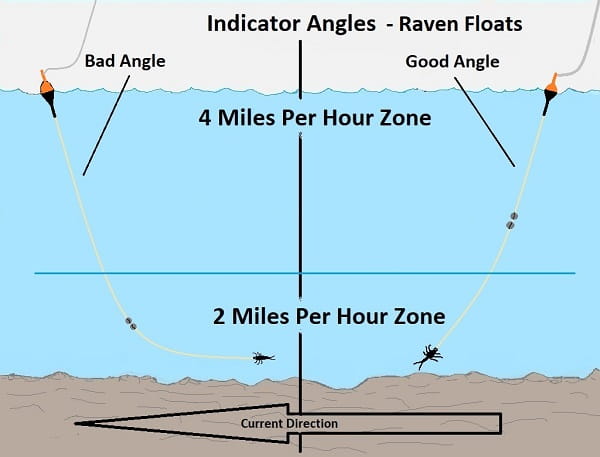
In order to slow your fly down and get the right angle, you need to mend properly or hold your indicator back just enough so that you will get a slight downward angle on your leader below your indicator.
You can see this in this diagram with the Raven indicators. I discuss this in more detail in my article Dead Drift Nymphing: Controlling Speed.
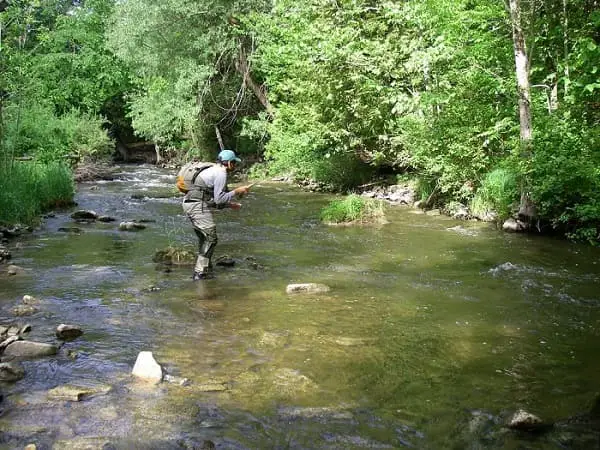
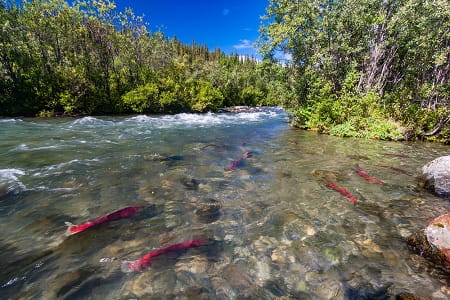
Covering The Water Effectively
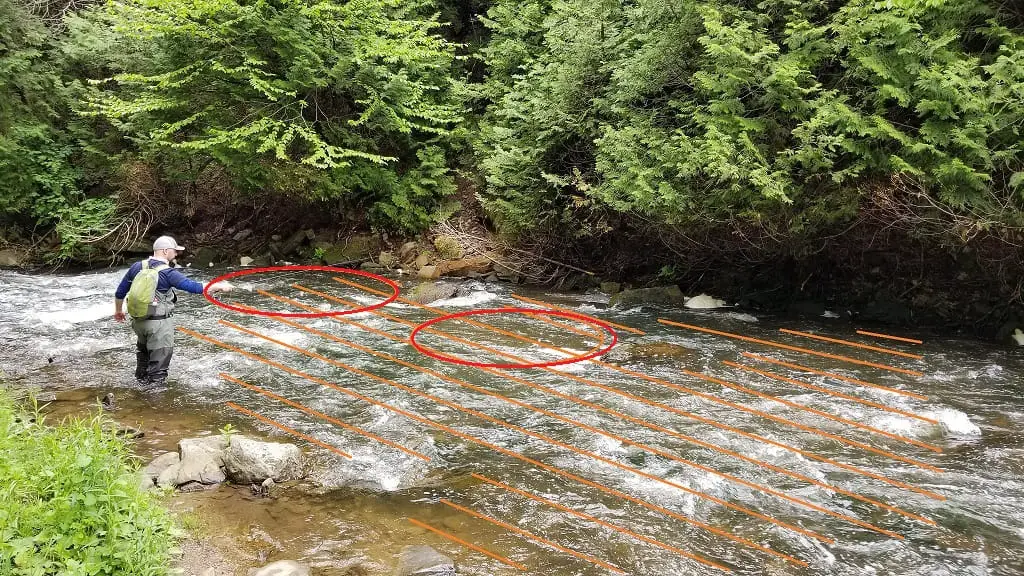
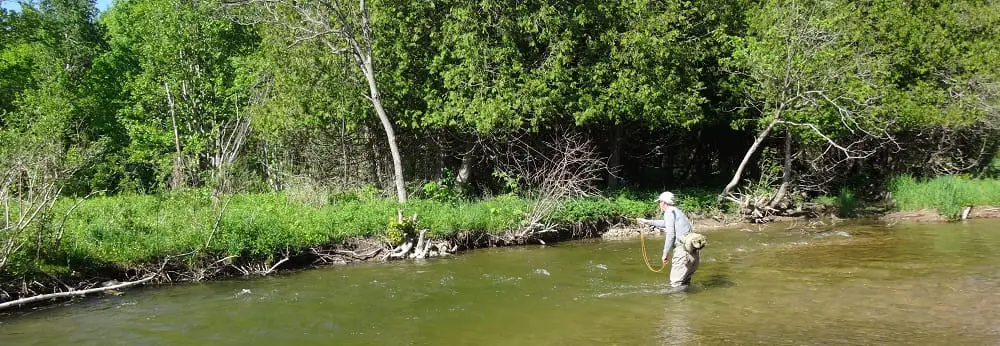
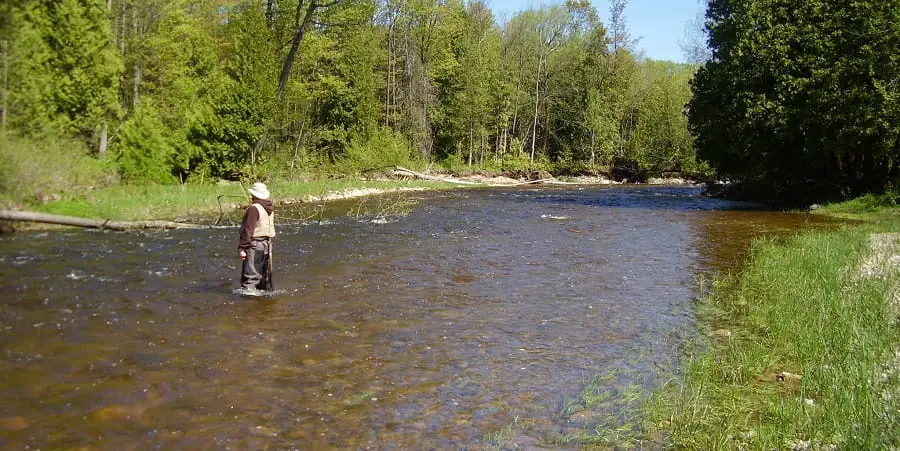
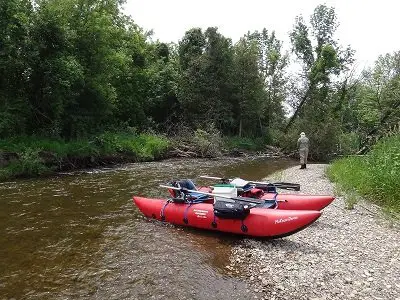
It’s important to cover all parts of the spots where a fish could be holding or feeding and covering it well. Even big trout will sometimes move out of their deeper holding spots into shallow water to feed, and these spots may be overlooked by some anglers.
Most anglers would only fish the two spots I have circled in the picture above simply because these two spots are behind big rocks and because they are the deepest and most obvious spots. If I was fishing this same spot, I would cover all of the water, and I would run one to three drifts down each of the orange lines on the pictures to make sure I covered everywhere.
The reason I fish it this way is that in this particular trout river, I have caught many big brown trout over 20 inches sitting beside the rocks, in front of the rocks, and even out in open water sitting in 10 to 20 inches of water.
They are not always where you think they are, and if you fish only the most obvious spots you may be missing a lot of fish.
Setting The Hook
Setting the hook properly can increase the amount of fish you catch and decrease the number of tangles you will get.
I watch anglers set the hook so hard that their indicator and weight and flies come flying back at them causing them to hit themselves or tangle around their rod or end up in the tree 20 feet behind them.
I’ve watched guys set the hook so hard that the little 6-inch trout on their fly goes flying over their heads and ends up 50 feet behind them in the bush. I’ve even had to climb a tree to get a fish that was dangling from a branch.
This never happens to anglers that know how to set the hook properly.
I tell my clients that when the fly goes into the fish’s mouth, you only need to set hard and fast enough to move that fly two inches. That’s it!
I’m not saying to just move your fly two inches on every hook set, what I’m saying is that all it takes to get that hook into the fish is a short hook set and that you be mindful of how much power you use.
That means if your fly comes flying out of the water and hits you, your hook set is that hook is moving 20 feet further than required.
The reality is that many guys will start their hookset with the rod tip pointed up and out towards the fish, and at the end of their hookset, their rod tip is far behind them and almost opposite where it started. I call this the follow-through hook set, and it almost always puts your flies behind you, or on you, or up in the trees.
The simple solution is to shorten your hook set stroke.
When our rod tip is out in front of you, so is your hand, when you set the hook too hard and follow through your hand will be up near your shoulder and will be pointing behind you, this is too far.
I teach the guys to only bring their hand far enough back that their hand is straight up, and their rod tip is also straight up and neither is behind their shoulder.
When fishing in close, my hookset is often nothing more than just using my wrist with barely any elbow movement at all. When the fly is close, I set shorter, when my fly is 50 feet down the river I will set much harder with a longer hookset stroke.
I teach my clients to set the hook at the end of every single drift until they get it right, and until it becomes a habit, practice makes perfect!
Fly Selection and Rotation
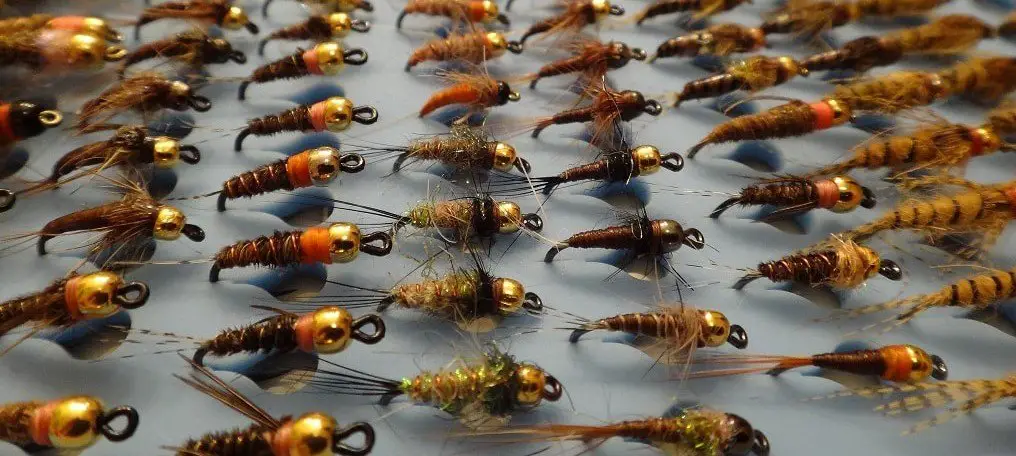
I choose my flies based on my observations of what bugs I see on the river, or what flies I know should work. I will run my best-guess fly through the spot and cover every foot. If my flies are getting down into the strike zone and I cover the water properly I should get a bite.
If I don’t get a bite, I will try another fly, something different, almost opposite of what I just used. There is no point trying a little brown nymph and then trying another little brown nymph that is similar.
I start rotating through my flies, trying different patterns and different sizes. I may try a pheasant tail nymph, and if that doesn’t work, I may switch to a caddis larva, and if that doesn’t, work I might try a worm pattern, and if that doesn’t work, I may try a woolly bugger or a hares-ear pattern.
I just keep rotating through flies until I figure out what they want or until I determine they are just not eating.
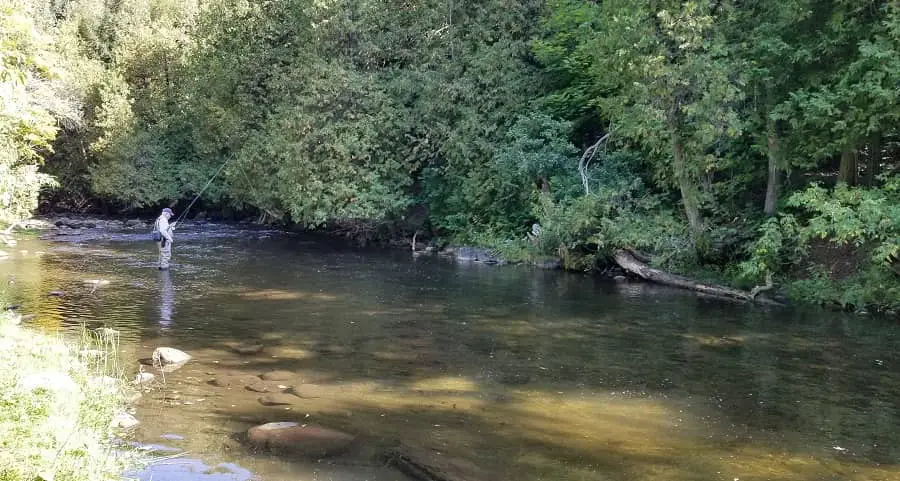
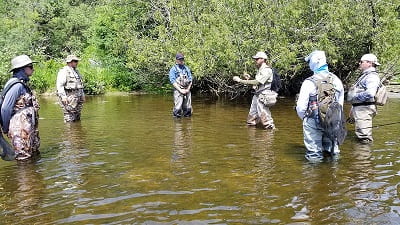
Nymphing Approach

This is the bonus tip that I mentioned earlier and it is likely the most important tip of all the tips on this page for one simple reason.
The reason it is the most important tip is that if you do not approach every spot properly and you spook your fish before you even get to do all that other great stuff I just told you about, you won’t catch any fish.
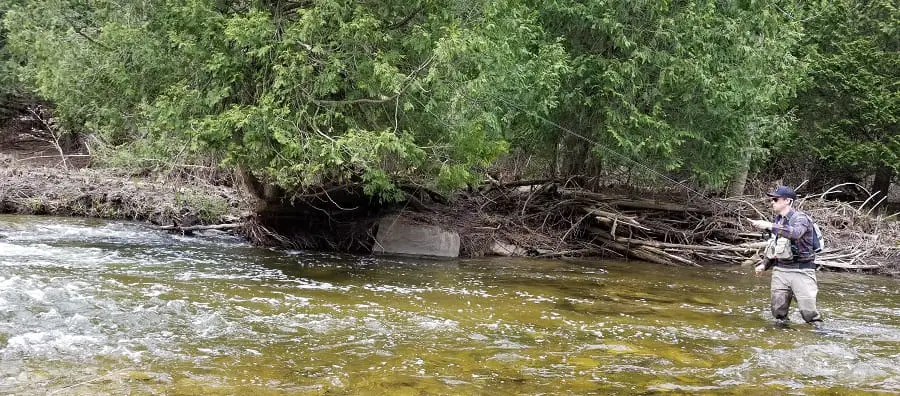
I’ve said this time and time again that I honestly believe that most anglers make the fish in the pool they are about to fish go lack-jaw before they even make their first cast.
Trout are not much different than most wild animals. As soon as that wild animal notices you they are going to run away or freeze. I have seen trout do both of these things. So it won’t matter how good your fly is, or how good your presentation is, if you have already spooked that big trout in the pool it’s game over.
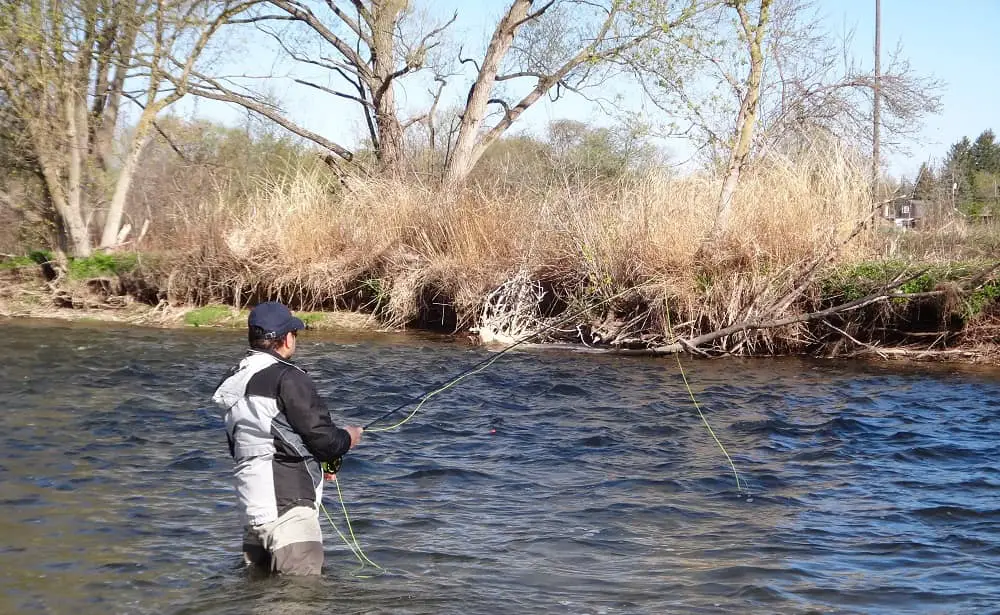
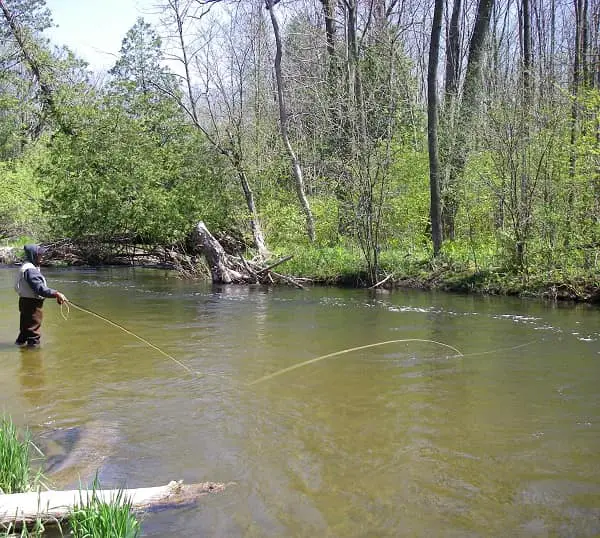
In the picture above the angler is standing in the wrong spot. Trout generally look upriver and an angler standing upriver if going to be seen. Sure he will probably still catch some smaller trout because they are dumber than dumb, but I’ll bet every big fish in this spot has lockjaw.
Make sure you know how to fish so that you are not seen or heard.
That should get you started on your way to catching fish with indicators.
Got a question or comment about indicator fishing? Maybe there was something I missed or something that works for you. Let me know in the comments below.
Tight Lines!
Graham
Hi Graham,
Thank you for being so generous with your knowledge and time writing these articles. They are so informative and often break the traditional thinking which makes a lot of sense to me once you pointed them out. I enjoy and learn a lot reading them.
Thanks again.
Nick
Graham, thanks for sharing these invaluable insights; really great stuff!
Curious about what you refer to as the “good angle” with the Raven float. Although that addresses the overspeeding of the fly, it seems to me that it introduces the problem of delayed strike detection; especially compared to the “bad angle”, where although the fly is overspeeding/dragging, the strike detection will be quicker. In the “good angle”, with the float being slightly behind the fly, will need to catch up a little, and then it’ll react to the fly being taken by the fish.
Is it your assessment that we have to either compromise on speed of strike detection or dragging the fly and that you place more emphasis on the latter, because that overall brings more fish to the net? Would really love to hear your thoughts about this!
Also, this is something that’s confused me about centerpin rigging as well; as they use the same overall idea (the beads/eggs ahead of the float).
Looking forward to reading your reply.
Best Regards,
Mustafa
Hi Mustafa,
There is definitely a compromise. The choice is to control the speed of your fly and gat far more bites and possibly miss some bites, or get no bites or only a few bites but detect all bites. In my experience, the angler that controls the speed of their fly will put far more fish in the net, sometimes 10 times more! Speed is likely the most critical part of the presentation. Speed control and presentation are why methods like Euro nymphing (done well) can’t be beaten.
Hope that clears it up for you.
Graham
Regarding the Raven indicators, I see that they require silicon tubing that the vendor also sells. Does that mean that the indicators can be adjusted up or down the leader as the fisherman adjusts to changing locations? I’m in western NC and my favored waters are small freestone streams. Thanks.
Hey Mike,
You are correct, you can simply slide the indicator up or down the leader to set the depth.
Good Luck
Graham,
Have been looking to improve my indicator nymphing techniques and this article has taught me alot. Thanks!